Finding Thyme to Cook

Thyme is of the Essence

Archive for the category “entrees”

maple mustard chicken

We eat a lot of chicken so I am always searching for new recipes, which would seem to be easy, but I find it daunting.   This may be your new go-to chicken recipe!!!  It’s hard to believe that with so few ingredients and so little effort,  it delivers big on flavor!!  I have seen a few different variations on this recipe, but this is by far the easiest and for us, the tastiest.  Try it tonight!!!

•    canola oil
•    4 chicken cutlets
•    ½ cup flour
•    ½ cup maple syrup
•    1/3 cup dijon and stone ground mustard
•    brown rice

Preheat oven to 350 degrees.

Heat oil in skillet on medium high heat.  Dredge chicken in flour and brown on both sides – about -3 minutes. 

Place chicken in baking dish. 

In small bowl, combine syrup and mustards in a bowl . . .  you can use any mustard you like, but I found the dijon combined with stone ground was perfect. 

Pour over chicken.

Cover and cook for 30 minutes. 

Serve over rice and spoon sauce over.

Print Recipe

chicken pot pie

As you may or may not know, my husband loves pies . . . he loves cherry pie, lemon cream pie, blueberry pie,  banana cream pie, hostess pies, and of course, chicken pot pie!!!  After I learned how to make a decent crust (looks aren’t everything), I make pies more often, which he appreciates.  It was an unusual rainy weekend in Southern California, so we stayed home and watched a lot of March Madness and cooked a lot of good things . . . like chicken pot pie.

•    Pie Crust – (Penny’s Pie Crust)

•    5 tablespoons butter
•    1 onion – diced
•    3 medium carrots – diced
•    2 garlic cloves – minced
•    ½ cup all purpose flour
•    4 cups chicken broth
•    1 bag of frozen pearl onions
•    1 bag of frozen peas
•    3 cups cooked chicken – bite size cubes
•    1/4 cup fresh parsley – chopped

Make any crust you wish (I use Penny’s Pie Crust).  Recipe posted separately.  However, you should prepare the filling before the pie crust.

Preheat oven to 375 degrees.

FILLING

In a large pot, melt butter over medium-high heat.

Add onion and carrots and cook until softened – about 7-9 minutes.

Add garlic and cook about 30 seconds.

Add flour and stir to coat vegetables.

Slowly add broth, whisking constantly until the sauce is smooth.

Bring to boil, reduce heat and simmer for about 8-10 minutes, until thickened.

Stir in peas and pearl onions.

Season with salt and pepper and add chicken and parsley.

Pour filling in either a two quart baking dish or small individual baking dishes.  Set aside and make dough.

Place prepared dough over the filling and crimp edges.  Cut vents in dough.

Place baking dish(es) on baking sheet and bake 45 to 50 minutes, until crust is golden.  Let stand about 15 minutes before serving.

Print recipe

pie crust for dummies. . . cindi!!!

Pie Crust has always been a challenge for me!!!  Just too much is involved and too much can go wrong!!!

Here is an excerpt from some a pie crust recipe:

Add ice water 1 Tbsp at a time, pulsing until mixture just begins to clump together. If you pinch some of the crumbly dough and it holds together, it’s ready.

If the dough doesn’t hold together, add a little more water and pulse again. Note that too much water will make the crust tough.

Who wants tough dough?

and another…

If you want an extra flaky crust, shmoosh the dough mixture into the table top with the heel of the palm of your hand a few times.

This will help flatten the butter into layers between the flour which will help the resulting crust be flaky.

You can easily skip this step if you want.

So does that mean if you skip the step, you won’t have flaky crust?

and another…

How do you keep those butter pieces visible? You keep them cold.

If they get warm — even a little warm — they get soft, and if they get soft before they hit the oven, they have less of an ability to make the dough flaky.

Do everything in your power to keep them cold.

Cube the butter and re-refrigerate it, mix your flour and sugar and salt and refrigerate that bowl too.

If you’re rolling that dough out and it tears and sticks and you must start again?

Really?  “start again” – no thank you!!!

It’s just too daunting and intimidating.

I have tried over the years to make a good pie, especially since my husband loves pie, but never could.  Then my best friend came to the rescue.  She is a phenomenal baker and she knows my limitations with baking.  One year she gave me one of the best birthday presents ever.   A one on one class at my home with Penny from Penny’s Pies –  a life changing experience.  At first I thought it would be weird having someone come over to your house to teach you to make a pie, but whatever.  So one evening, while my husband and son were at the MLB All Star Game and I knew they would be gone for a very long time, I reluctantly scheduled Penny to came over to teach me how to make crust.   So very glad I did – it was incredible — she actually had a non-intimidating way to make a perfect crust every time, without using cold butter!!!  Now, crimping is a different story, but I’m sure I’ll get the hang of that with practice.  We had such a fun evening.  We made a quiche (which we ate), a blueberry pie (which my husband and I ate the next day) and a blind pie shell (which I used to make a cream pie).  I now can make pie crust whenever I want with no problem.  When you peruse the ingredients, you will get to peanut oil and shudder.  Don’t!!!  It works!!!  I don’t know how or why, but it makes an incredibly easy pie crust that is incredibly tender and flaky WITHOUT having to keep the butter cold!!!  It is a miracle!!!

This is for a nine inch deep dish pie plate (Emile Henry)
•    2 ½ (11 ½ oz) unbleached All-Purpose flour
•    2 tablespoons (½ oz) cake flour
•    pinch of salt

completely whisk the above ingredients together before adding liquids

•    2/3 cup peanut oil
•    1/3 cup whole milk

•    2 -3 tablespoons heaving cream – to brush on dough for glaze

Use a small stainless steel mixing bowl (1.5 quarts with tall sides).

Measure out the flours and salt into the bowl (best way is to weigh the dry ingredients).

Whisk the dry ingredients. Pour on the oil and the milk in that order.

Cut the ingredients together with an ordinary dinner knife, making “X’s” across the center and

turning the flour up from underneath by scraping the sides of the bowl as you turn.

This may take about 10 strokes.  DO NOT OVER MIX.  Dough should resemble coarse oatmeal.

Place one piece of wax paper, about 14 inches long, on working surface.

Turn the dough out onto the center of the wax paper and scrape the bowl clean.

Using your fingers, gently roll the dough around so that the liquid absorbs any pockets of dry flour.

Do not knead or over-work the dough, the dough should just hold its form.

Push the dough into a loaf-shaped mound.

Turn loaf over on wax paper. If there is dry flour remaining, simply fold it in.

Using the knife, divide the dough in half and shape two balls.

Place one ball, wrapped in wax paper back in bowl (or wrap and freeze for later use if you don’t need it).

Place the other ball in the center of the wax paper, flatten the dough slightly so you have a level top surface and cover with another piece of was paper.

Roll out the dough into a circle, about 2 inches beyond the edge of the pie dish – approximately 13″.

Always roll dough out with a rolling pin starting from the center of the circle, changing direction as needed – not back and forth.

Peel off the top layer of paper.

Grasp the edge of the wax paper with both hands and left it straight up and place evenly, dough side down, either in your pie dish (if you are making a pie) or over your filling.

.

 Carefully peel off the wax paper Cover filling with top crust using the same method as above.

Trim the edges about ½ inch from the edge of the pie dish.

Cut vent slots and brush on heavy cream to glaze, but do not brush the cream on the fluted edges.

Bake according to directions of your pie.  Check to see if edges are too well done and wrap the edges so they don’t burn.

print recipe

lemon rosemary chicken

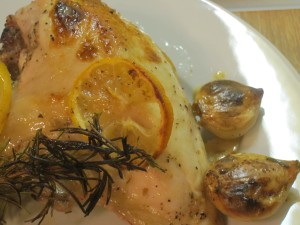
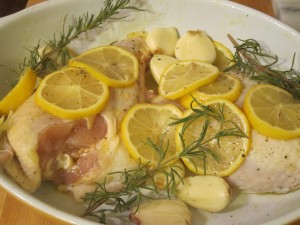
Not much to say on this one!!!  It took me less than ten minutes to get into the oven, and clean up was a breeze. The flavors are light and fresh and delicious with any side dishes.

•    2 chicken breasts – bone in
•    1 medium or two small lemons – sliced
•    5-6 garlic cloves – peeled and slightly smashed
•    3 sprigs of rosemary
•    olive oil

Preheat oven to 400 degrees.

Season chicken with salt and pepper on both sides. 

Place in small baking dish and add lemons slices, garlic cloves and rosemary. 

Drizzle olive oil over all ingredients and spread all over.

Bake for 40 minutes.  Turn on broiler and broil for five minutes.


 Make sure you eat the roasted garlic!!!

Print recipe

chicken baked in cream


I found this recipe in my new Bed and Breakfast recipe book and it was delicious.  I know – I know – it’s not very colorful and pretty bland looking, but don’t let that fool you.  We have been trying to eat less red meat, and I’ve decided to try unusual recipes. . . “unusual” being relative when it comes to what my husband will eat. It was very easy, although it takes some cooking time. It makes a really thick yummy sauce while baking and was perfect with some brown rice – the secret is cooking it in a over low heat for almost two hours.  Maybe next time I’ll serve it on a red plate!!!

•    4 chicken breasts – skinless and boneless
•    ½ cup flour
•    1 teaspoon paprika
•    1 teaspoon seasoned salt
•    pepper
•    butter
•    1 ½ cups heavy cream

Preheat oven to 300 degrees

Mix flour, paprika, season salt and pepper in a paper bag.  Add chicken breasts and shake.

Melt butter in a large skillet over medium- high heat.

Add chicken breasts and brown on both sides – about 10 minutes total.

Remove and place in baking dish.

Pour cream over chicken breasts.


Cover tightly and place in oven for 1 ½ – 2 hours or until tender.

Serve over rice and spoon sauce over chicken.

print recipe

chicken zucchini bake

Most families have a treasure trove of recipes, no matter how simple or complex.  When you prepare a family recipe, you are not just making a meal, you are reliving your own  memories, as well as creating new memories for your own family.  The power of food – it nourishes our bodies as well as our souls. 

When my father retired from the military, even though he began a new career in teaching, he started cooking more.  This was one of his creations that would fall into the “simple” category.  He used to type out the recipes on index cards, using his old manual typewriter.  Over the years, I have transferred most of the recipes to the computer, but have saved the cards, with all the typos, mistakes and handwritten notes, just because.   Cooking was his passion, and I always thought he would have been a natural at culinary school.   He would have loved  cooking blogs, cooking shows and the internet.   He loved watching the pioneers of TV cooking shows – Galloping Gourmet and Julia Child

Even though it is probably one of the easiest dinners you will ever prepare, it doesn’t make it any less special or delicious.  To make it even more exceptional, I used BBQ sauce that my brother sent me from the mid-west after we visited for my niece’s wedding and tried some real Kansas City BBQ. 

•    4 medium zucchinis
•    4 boneless, skinless chicken breasts or thighs
•    2 tablespoons freshly squeezed lemon juice
•    1 cup bottled BBQ sauce
•    2 teaspoons dried oregano
•    1 1/2 tablespoons dried minced onions

Spray baking dish with cooking spray.  Cut zucchini lengthwise and place in shallow baking pan. 

Put chicken over zucchini and sprinkle with salt and pepper

Combine remaining ingredients in bowl or measuring cup and

pour over chicken

Bake uncovered for 30 minutes at 375, baste with sauce, and bake another 20 minutes

Serve over rice

Print recipe

roasted vegetable lasagna

I am truly predictable.  About 23 years ago, a friend of mine (who was my boss at the time) taught me how to knit.  She was incredible and made the most unique sweaters, dresses, scarves, hats in the most unusual yarns.  They were truly phenomenal.  I have always been envious of creative people and she was no exception.  So, we decided on a project and we picked out cool yarn, cool needles, cool books with cool patterns of cool projects, cool bag to hold the cool yarn,  cool needles and cool books, and started on my sweater.

My mentor guided me along the way and anytime I had a problem, she was there with a solution. If I made the wrong stitch, she unstitched it and showed me what to do.  It was a perfect scenario.  Apparently, my husband had a little less faith in me and made a bet with her that I wouldn’t finish the sweater, not even a time limit.  We were determined to prove him wrong.

The first few weeks, I knitted like a fiend – lunch breaks, after work, doctor’s waiting rooms, dentist’s waiting rooms, sporting events, social events, car rides – you get the picture.  I got the first half the sweater done in about 3-4 weeks and it was PERFECT  nice.  My friend and I were pretty proud of my progress.  On to the second half . . .

I started out as feverishly as I did on the first half and then it happened.

I don’t recall the exact moment, where I was or why.   But just like that – I completely lost interest in knitting.  I put my cool yarn, cool needles, cool books and cool sweater half in the cool bag and put them in the closet, never to knit again.  It was like I had a horrific experience involving knitting needles and out-of-control skeins of yarn.  Wow – I pulled “skein” out of nowhere.

My husband obviously knew me pretty well.  I always have good intentions, but I get bored oh so easily.  I’m guess we should be surprised that we have been married 31 years!!!!

So what’s the point of this story?  My blogging seems to have run the same course.  After feverishly posting recipes, I got bored a bit.  I thought I should post 3-5 recipes a week, which was crazy, so now, I’ve decided to just post when I feel like it.

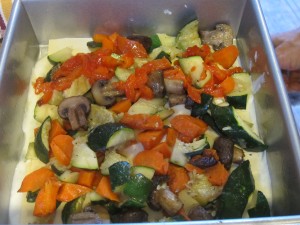
We have been trying to go meatless at least two days a week, so this was one of my concoctions, which actually turned out pretty good.  Roasting the vegetables prior to assembling the lasagna provided such a rich flavor – especially the roasted garlic.

  • 3 medium zucchini – cut lengthwise and into 1/3 inch slices

  • 3 carrots – cut int 1/3 inch slices

  • 1 pound cremini mushrooms – halved

  • 1 red bell pepper – quartered and seeded

  • 2-4 tablespoons olive oil

  • pepper and salt

  • 2 garlic cloves – whole

  • 1 garlic cloves – minced

  • 3 tablespoons unsalted butter

  • 1/4 cups all-purpose flour

  • 3 1/2 cups whole milk

  • 4 ounces italian fontina – grated

  • 1/2 cup parmagiano reggiano – grated

  • 3 tablespoons basil – finely chopped

  • 9 lasagna noodles – no boil

Preheat oven to 425 degrees

Brush two large baking pans with 1 tablespoon olive oil (total), arrange zucchini, mushrooms and two whole garlic cloves on one pan and carrots and red pepper on the second pan.

Brush with remaining olive oil and sprinkle with salt and pepper and roast about 15 minutes, switching pans halfway through

Remove zucchini and mushrooms

Turn peppers and roast peppers and carrots an additional 10 minutes and remove from oven

Transfer peppers to bowl and cover and let stand 10 minutes before peeling.

After all the vegetables cooked, I chopped them up a bit before preparing the lasagna.

While vegetables roast, cook minced garlic in butter in a 2 quart saucepan over moderate heat

whisking frequently about 30 seconds

Whisk in flour and cook, constantly whisking, about two minutes

Slowly add milk and a steady stream, whisking constantly and bring to boil

Reduce heat and simmer, whisking frequently about eight minutes

Sauce will thicken slightly when it first comes to a boil. Remove from heat and cool about 10 minutes, stirring occasionally

Stir in cheeses, basil and ½ teaspoon of salt

Soak noodles in hot water just until pliable – about 8-10 minutes

Spread 2/3 cups sauce in a 8 x 8 inch baking dish

Drain one noodle at a time on a clean kitchen towel and place three noodles overlapping a bit over the sauce

Top with half of the veggies, then more sauce

Continue with another layer of noodles, rest of  veggies and another layer of noodles and top with the rest of the sauce and a little Parmesan.

Notice the peppers?  That’s my side – my husband doesn’t like peppers!!

Bake for 35-40 minutes until golden brown

Four servings

Print recipe

chicken and chard

“What’s this green stuff?”   This is what I hear if it’s green and on the plate.  Vegetables are not on my husband’s list of “favorite things” and it can be challenging to serve them.  I have spent years and years of experimenting, begging and resorting to camoufloge.  A few years ago, I was able to not only sneak by the cauliflower au gratin, but he actually had seconds.  To this day, he doesn’t know what he ate. . . that is, until now. . . oops.

My new favorites are bok choy (a later post) and chard.    I get a lot of it with my organic produce delivery Farm Fresh to You,  and rather than substituting it with a more familiar item, I decided to tackle it head on.   After going through several recipes, I found this from Everyday Food and proved to be a perfect recipe to try.  He loves chicken and carrots, so all I needed to do was get him to love tolerate chard.  This is pretty healthy and quick (less than an hour from start to finish) and only takes one pot, so clean up is easy.  The lemon sets it off nicely and I think you will enjoy it.  Bottom line – my husband actually said it was good.

• One whole chicken cut up

• olive oil

• salt and pepper

• 3 garlic cloves – chopped

• 1 bunch of Swiss Chard leaves torn into 2 inch pieces

• 1 onion – diced

• 3 carrots – diced

• 2 teaspoons lemon zest

• 1 ½ cups basmati rice

• 2 ½ cups chicken broth

Season chicken with salt and pepper

Heat oil on high in a large Dutch Oven with a tight fitting lid. Add chicken, skin side down and cook for 12 minutes, turning once.

 Remove to a plate

Reduce heat to medium and add garlic, onions and carrots. Cook until onions are translucent – about 4 minutes.

Add chard leaves, lemon zest and rice – cook about 1-2 minutes.

Add broth and bring to boil.


Reduce to simmer and arrange chicken (skin side up) in pan.

Cover and cook about 25 -30 minutes, until chicken is cooked through.

Remove and let set for 5 minutes before serving.  Serves four.

Print Recipe

sausage and kale gratin

I woke up Tuesday morning and this was on my front porch.  Thank you Farm Fresh to You!!   There was kale, chard, broccoli, cauliflower, tangerines, oranges, apples, yams and the biggest head of lettuce I have ever seen in my life!!!

So, now the hard part – eating all of it!!  My first challenge was making something with kale that my husband would eat.  He really doesn’t like much of anything food that is green, so I had a challenge.  Lucky for me the LA Times had this gratin recipe that week.

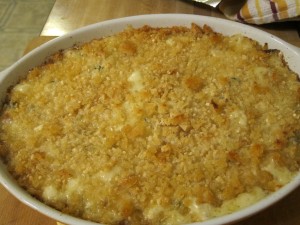
I figured, if I chop the kale really small, mix it with sausage, add a white sauce and cheese and top it with breadcrumbs, maybe he wouldn’t notice.  And, he didn’t . . . until now!!

Now to the recipe. . .

  • 4 tablespoons olive oil
  • 1 pound fresh Italian sausage (turkey or pork)-casings removed
  • 1/3 cup dry white wine
  • 1 bunch kale – chopped
  • ½ cup unsalted butter
  • 1/3 cup flour
  • 2 cups milk
  • 8 ounces goat cheese
  • 1 cup Parmesan cheese
  • 1 cup fresh breadcrumbs
  • 4 tablespoons melted butter
  • 1 tablespoon fresh herbs (parsley, oregano, basil) – minced

Preheat oven to 350 degrees.

In a large saute pan, heat the olive oil over medium-high heat. Add sausage and break up and cook until brown – about 8 minutes.

Add wine, scraping bits off the bottom of the pan and cook until wine is almost evaporated -a bout 5 minutes. Decrease heat a bit.

Stir in kale and stir until kale wilts and turns bright green. Remove from heat and set aside.

In large sauce pan, melt ½ cup butter over medium heat. Whisk in flour to form a roux.

Add milk slowly while constantly whisking until thickened and smooth.

Bring to a simmer and cook about 5 minutes. Add crumbled goat cheese and whisk until cheese is melted and sauce is thoroughly smooth.


Stir in sausage and kale and remove from heat.

Spoon mixture in gratin dish.

In medium bowl, combine breadcrumbs Parmesan cheese. Sprinkle evenly on top of sausage/kale/sauce. Drizzle melted butter on top.

Bake for about 30 minutes until golden brown. Let sit 5-10 minutes before serving.

8 servings

Print recipe

Stuffed Chicken with Prosciutto and Fontina

 STUFFED CHICKEN WITH

PROSCIUTTO AND FONTINA

Adapated from Taste – Neiman Marcus

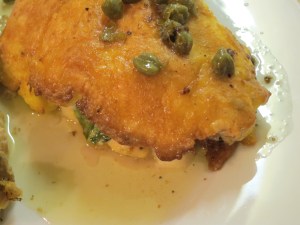
This is about as close as I will get to having something from Neiman Marcus!!  A friend of mine from work brought in this cookbook  from Neiman Marcus – “Taste” and after tagging recipes that I wanted to try, when I ran out of “post-its,” I went on Amazon and purchased the book.  It is fabulous.  There are little stories in addition to some incredible recipes.  This is the first recipe I tried and it worked out perfectly, although mine looked nothing like the picture in the book!!

  • 6 skinless, boneless chicken breasts
  • 1/4 teaspoon grated nutmeg
  • salt and ground pepper
  • 6 thin slices of prosciutto
  • 6 slices of Fontina cheese – about 1/4 inch thick
  • 1 cup spinah leaves, slightly packed
  • 2 tablespoons olive oil
  • 4 large eggs
  • 2 cups coarsley grated Parmesan Cheese
  • 1 cup all purpose flour
  • 3 tablespoons butter
  • 2 tablespoons capers, rinsed and drained
  • juice 1/2 lemon
  • 2 tablespoons chopped parsley – optional for garnish

Preheat oven to 350°

Place chicken on cutting board between two pieces of plastic wrap.  Pound until approximately 1/2 inch thick.  Remove plastic wrap and season the chicken with salt, pepper and nutmeg.

Wrap one slice of prosciutto around one slice of cheese and place it on chicken breast. 

Arrange spinach leaves on top.  You might notice that my husband’s piece does not have spinach – I believe he is allergic to anything green. 

Fold over chicken breast in half to make a package. 

Chill in refrigerator for one hour.  

Break eggs in a shallow biowl and beat lightly. Stir in Parmesan Cheese. 

Place flour in another bowl. 

Dip breast in flour first and then into the egg mixture.  

Heat oil in a non stick pan over medium-low heat and transfer breasts

to pan (two at a time).  

Brown on first side 3-4 minutes and carefully turn with spatula and brown

on other side for 3-4 minutes.  

Transfer breasts to baking dish and bake for 15-20 minutes.

While the chicken is baking, melt butter in a small saucepan

over medium heat. 

When it begins to brown,add the capers and lemon juice and season with salt and pepper.  Keep warm. 

Remove the chicken from the oven and place on serving plate and pour browned butter over the breast and garnish with parsley if desired.

Print recipe


Post Navigation